logo_300logo_300logo_300logo_300
  • Computer
    • Commodore
      • Articoli Commodore
      • Commodore64
      • Commodore128
    • Sinclair
      • Articoli Sinclair
      • ZX80
      • Timex 2068
      • ZX Spectrum
      • ZX Spectrum 128K
    • Enterprise 64-128
    • Emulatori
      • A500 mini
      • The C64
    • Tandy
      • Tandy CoCo 2
    • Mattel
      • Aquarius
  • Console
    • Nintendo NES
    • Atari
  • Pagine
    • Hardware
      • Recaping Helper
      • DT Flash Codes
      • Alimentazioni
      • ROM e Adattatori
      • Attrezzatura
      • Dram Tester
    • Emu & Cart
      • FLASHCARTS
      • MiSTer FPGA
    • Utilità
      • MagicBIN
      • Bootloader Arduino con S7
      • Calcolatori
      • Sprite C64
  • Downloads
  • Contatti
  • Donazione
Language
  • en_GB
  • it_IT
✕

Amstrad CPC464 TZXduino

  • Home
  • Computer Amstrad
  • Amstrad CPC464 TZXduino
Atari 2600 7800 mod composito
19 Ottobre 2020
Atmel ICE non riconosciuto
20 Novembre 2020
Pubblicato da Mirco G il 15 Novembre 2020
Categorie
  • Amstrad
  • Computer
Tags
  • Amstrad
  • cdt
  • CPC464
  • mp3
  • Tape loader
  • tzxduino
  • wav

Il ripristino

Ho recuperato un CPC464 funzionante ma con lettore cassette fuori uso ed aveva un cavo esterno per collegare un lettore mp3, tra l’altro collegato pure male sul registratore.
La prima cosa è la pulizia del computer e dopo averlo smontato tutto ho trovato la tastiera in pessime condizioni di sporco e ruggine… beh, via tutti i tasti!

Di seguito vi posto i dettagli dei passaggi, la ruggine è stata tolta con un bagno in aceto di vino bianco ed è stata grattata la ruggine più profonda.
Ho stampato dei tappi per coprire i supporti dei tasti visto che non sono rimovibili (potete fare anche con del nastro carta) e poi verniciato prima con un fondo antiruggine ed in fine una vernice nera.. avevo finito quella opaca ma il risultato è ottimo e comunque non si vede quando tutto chiuso.

Dopo una bella pulizia dei tasti e delle plastiche mi sono dedicato al registratore che purtroppo ha un paio di ingranaggi talmente usurati che non riesce a far girare il nastro, beh poco male visto che lo avrei usato con Arduino. Ho quindi smontato il registratore per poterlo reinserire in futuro se lo volessi riportare alla sua forma originaria e ora via con la MOOOOD!

TZXDuino

Per prima cosa occorre localizzare i punti dove collegare il segnale  audio di Arduino per caricare i programmi, seguite lo schema, il segnale remote non è necessario.
TZXDuino potete trovarlo già fatto su diversi siti internet e di aste oppure se volete cimentarvi nella sua costruzione, qui trovare lo schema che ho utilizzato per la mia versione.

Attenzione!
Il tasto del menù è sul pin D8 mentre sul firmware che si trova in rete è su D7, potete modificare lo schema oppure rimappare il pin nel codice di Arduino.

Vi allego il progetto che ho usato e realizzato con Eagle.

Scarica il progetto in Eagle

Il firmware utilizzato al momento della realizzazione dell’articolo è il 1.14
lo potete scaricare qui:
http://arduitape.blogspot.com/2019/05/tzxduino-114.html
oppure direttamente da questo sito.


Scarica il firmware 1.14


Per integrare tutto nel computer occorre una stampante 3D e un po’ di tempo da dedicarci, ma il risultato è veramente bello.
Siccome non volevo cavi esterni al computer e nemmeno bucare il case per metterci un jack per il lettore esterno e anche perché avevo un bel lettore inutile a bordo macchina… 

ecco l’idea di integrare tutto nel computer così da evitare anche di dover alimentare esternamente Arduino!


Caricando alcuni giochi mi è capitato un errore di lettura, vi allego i possibili errori che il CPC464 può dare:

  • Read error a: The signal is dropped or timing is incorrect.
  • Read error b: CRC error.
  • Read error c: Invalid file type / seems to be used with “CAS CHECK”. This is where you are comparing data in memory with data written to tape. So effectively a verify that data was written correctly.
  • Read error d: Block is too large to fit in the buffer. (given when you do a CAT on large blocks)

All-in-one

Mi sono fatto prendere la mano e visto che posso usare anche la stampante 3D mi son creato una cover per lo slot cassette ed una per i tasti del registratore dove ho posizionato il lettore di schede microSD.
Eccovi il prototipo per un display 2×16 che avevo in casa, fate attenzione perché non tutti i display hanno le stesse dimensioni.
Per i tasti ho usato dei 12×12 con cappucci colorati, li ho saldati su un supporto di una basetta mille fori avvitata alla cover, infine ho stampato un adesivo per far un po’ più carino il coperchio.

Anche se è probabile che le dimensioni del display non siano identiche vi allego il file che ho realizzato per le cover che non hanno ganci per tenersi ma vanno incollate con colla a caldo sul computer. Se preferite potete aggiungerci i supporti per evitare di incollarli, io li ho realizzati di fretta e ho messo il minimo indispensabile.

Scarica il file STL
Scarica la grafica

Lavoro finito! dopo due giornate tra pulizie, misure, stampe e saldature ecco il risultato.

Post Views: 1.368
Condividi
4
Mirco G
Mirco G
Smanettore tuttofare

post simili

30 Gennaio 2023

ZX Spectrum +2 audio-video mod


Leggi altro
28 Gennaio 2023

ZX Spectrum +2A audio-video mod


Leggi altro
30 Luglio 2022

Scheda diagnostica VIC20


Leggi altro

Commenti 5

  1. Futian Ezheny ha detto:
    24 Giugno 2023 alle 12:51

    Hey Mirco

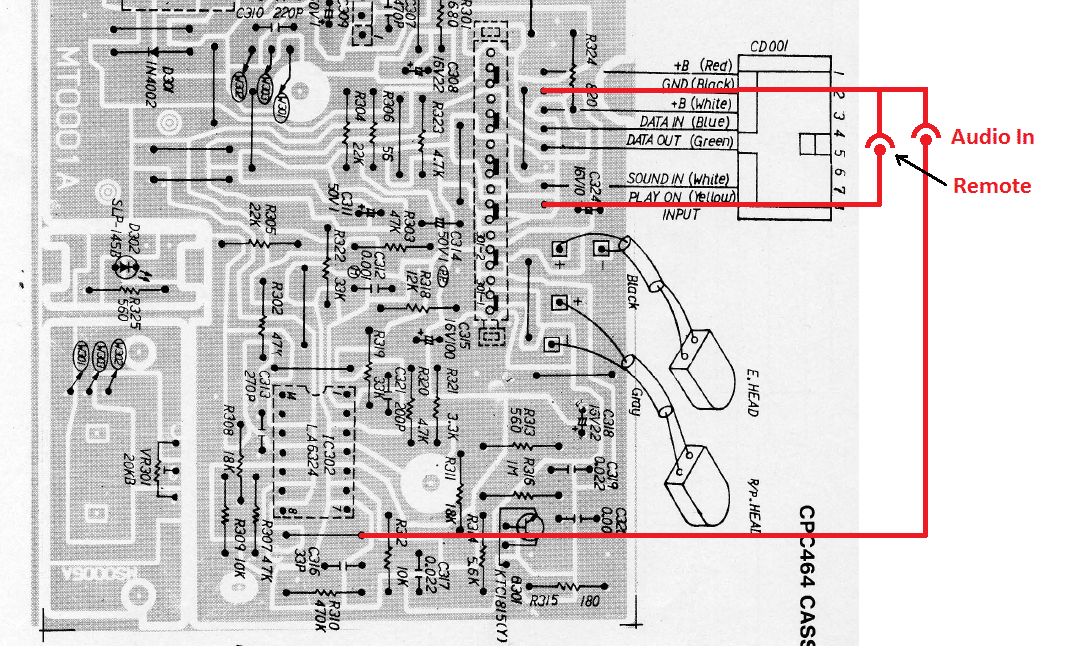
    The link to the CPC464 schematics is broken. It is:
    https://retrofixes.it/wp-content/uploads/2020/11/464_Audio_CD_Port.png
    but it should be:
    https://retrofixer.it/wp-content/uploads/2020/11/464_Audio_CD_Port-1024×614.png

    Best regards
    Futian

    Rispondi
    • Mirco G ha detto:
      25 Giugno 2023 alle 10:43

      Thanks for the report, I have updated all the links and images.
      After an update all images were working but had lost the link to the source.

      Rispondi
  2. Mark ha detto:
    31 Agosto 2023 alle 10:42

    Hi Mirco,

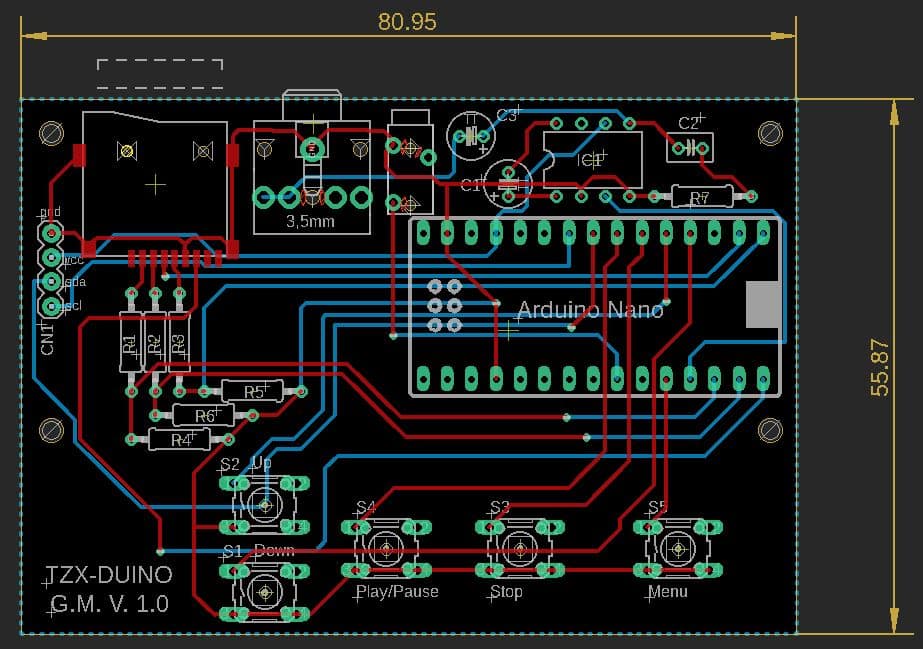
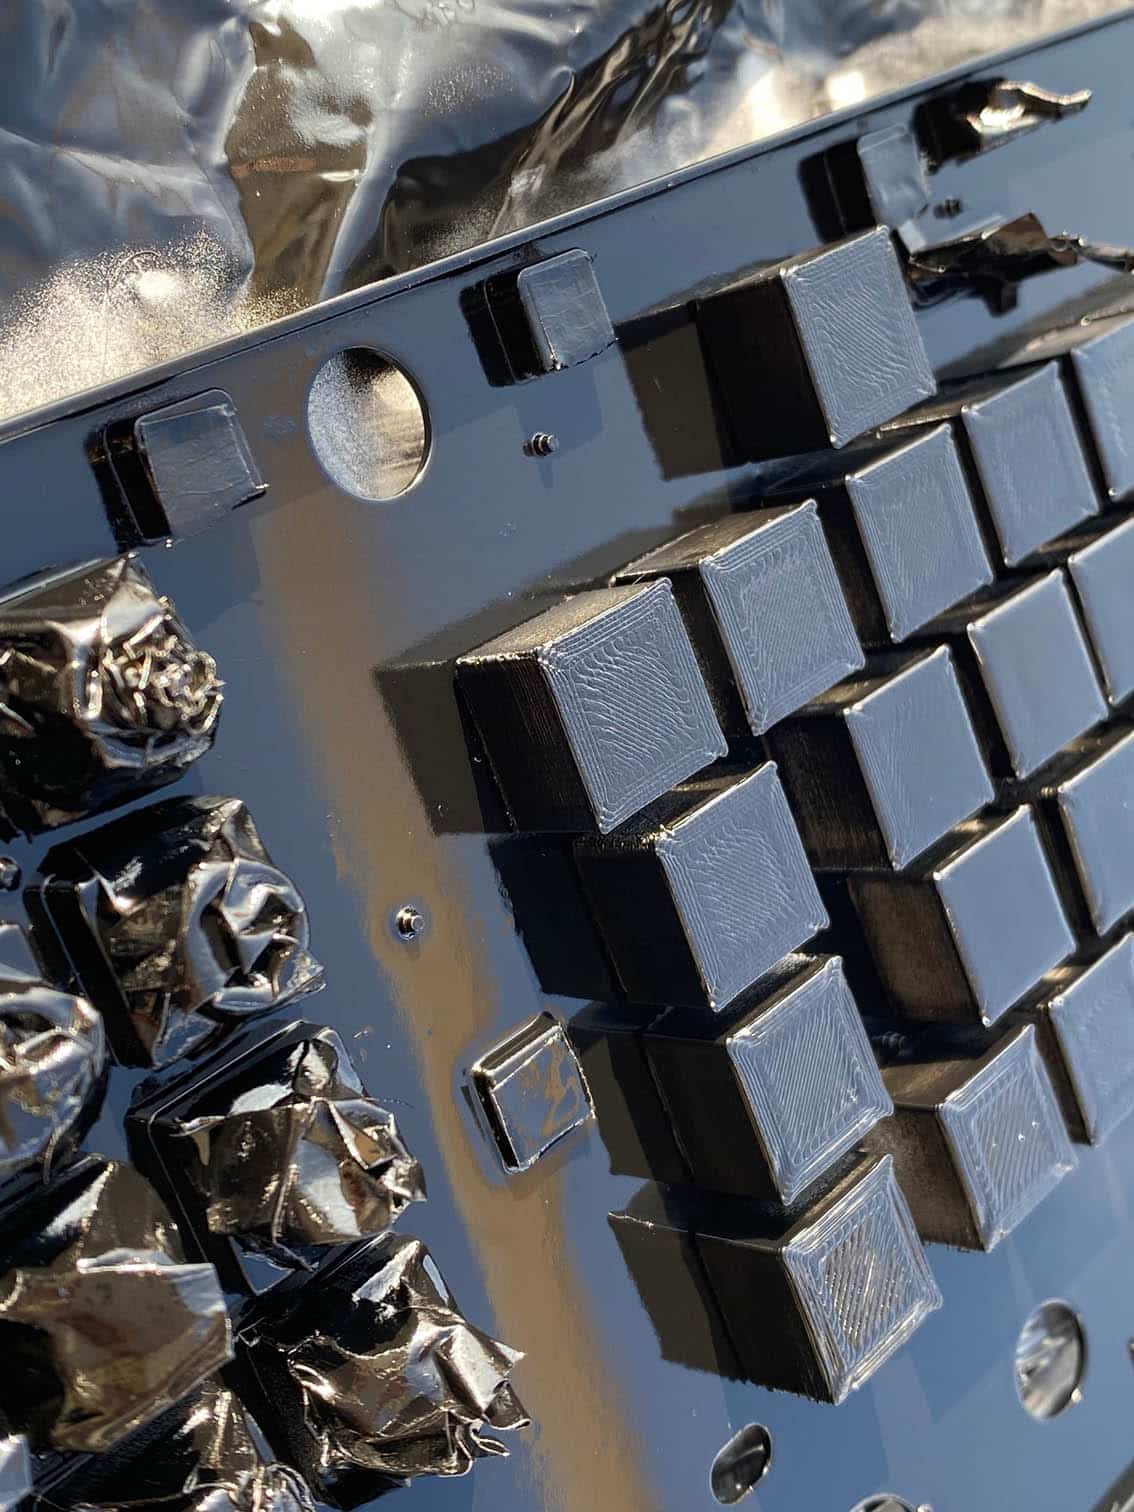
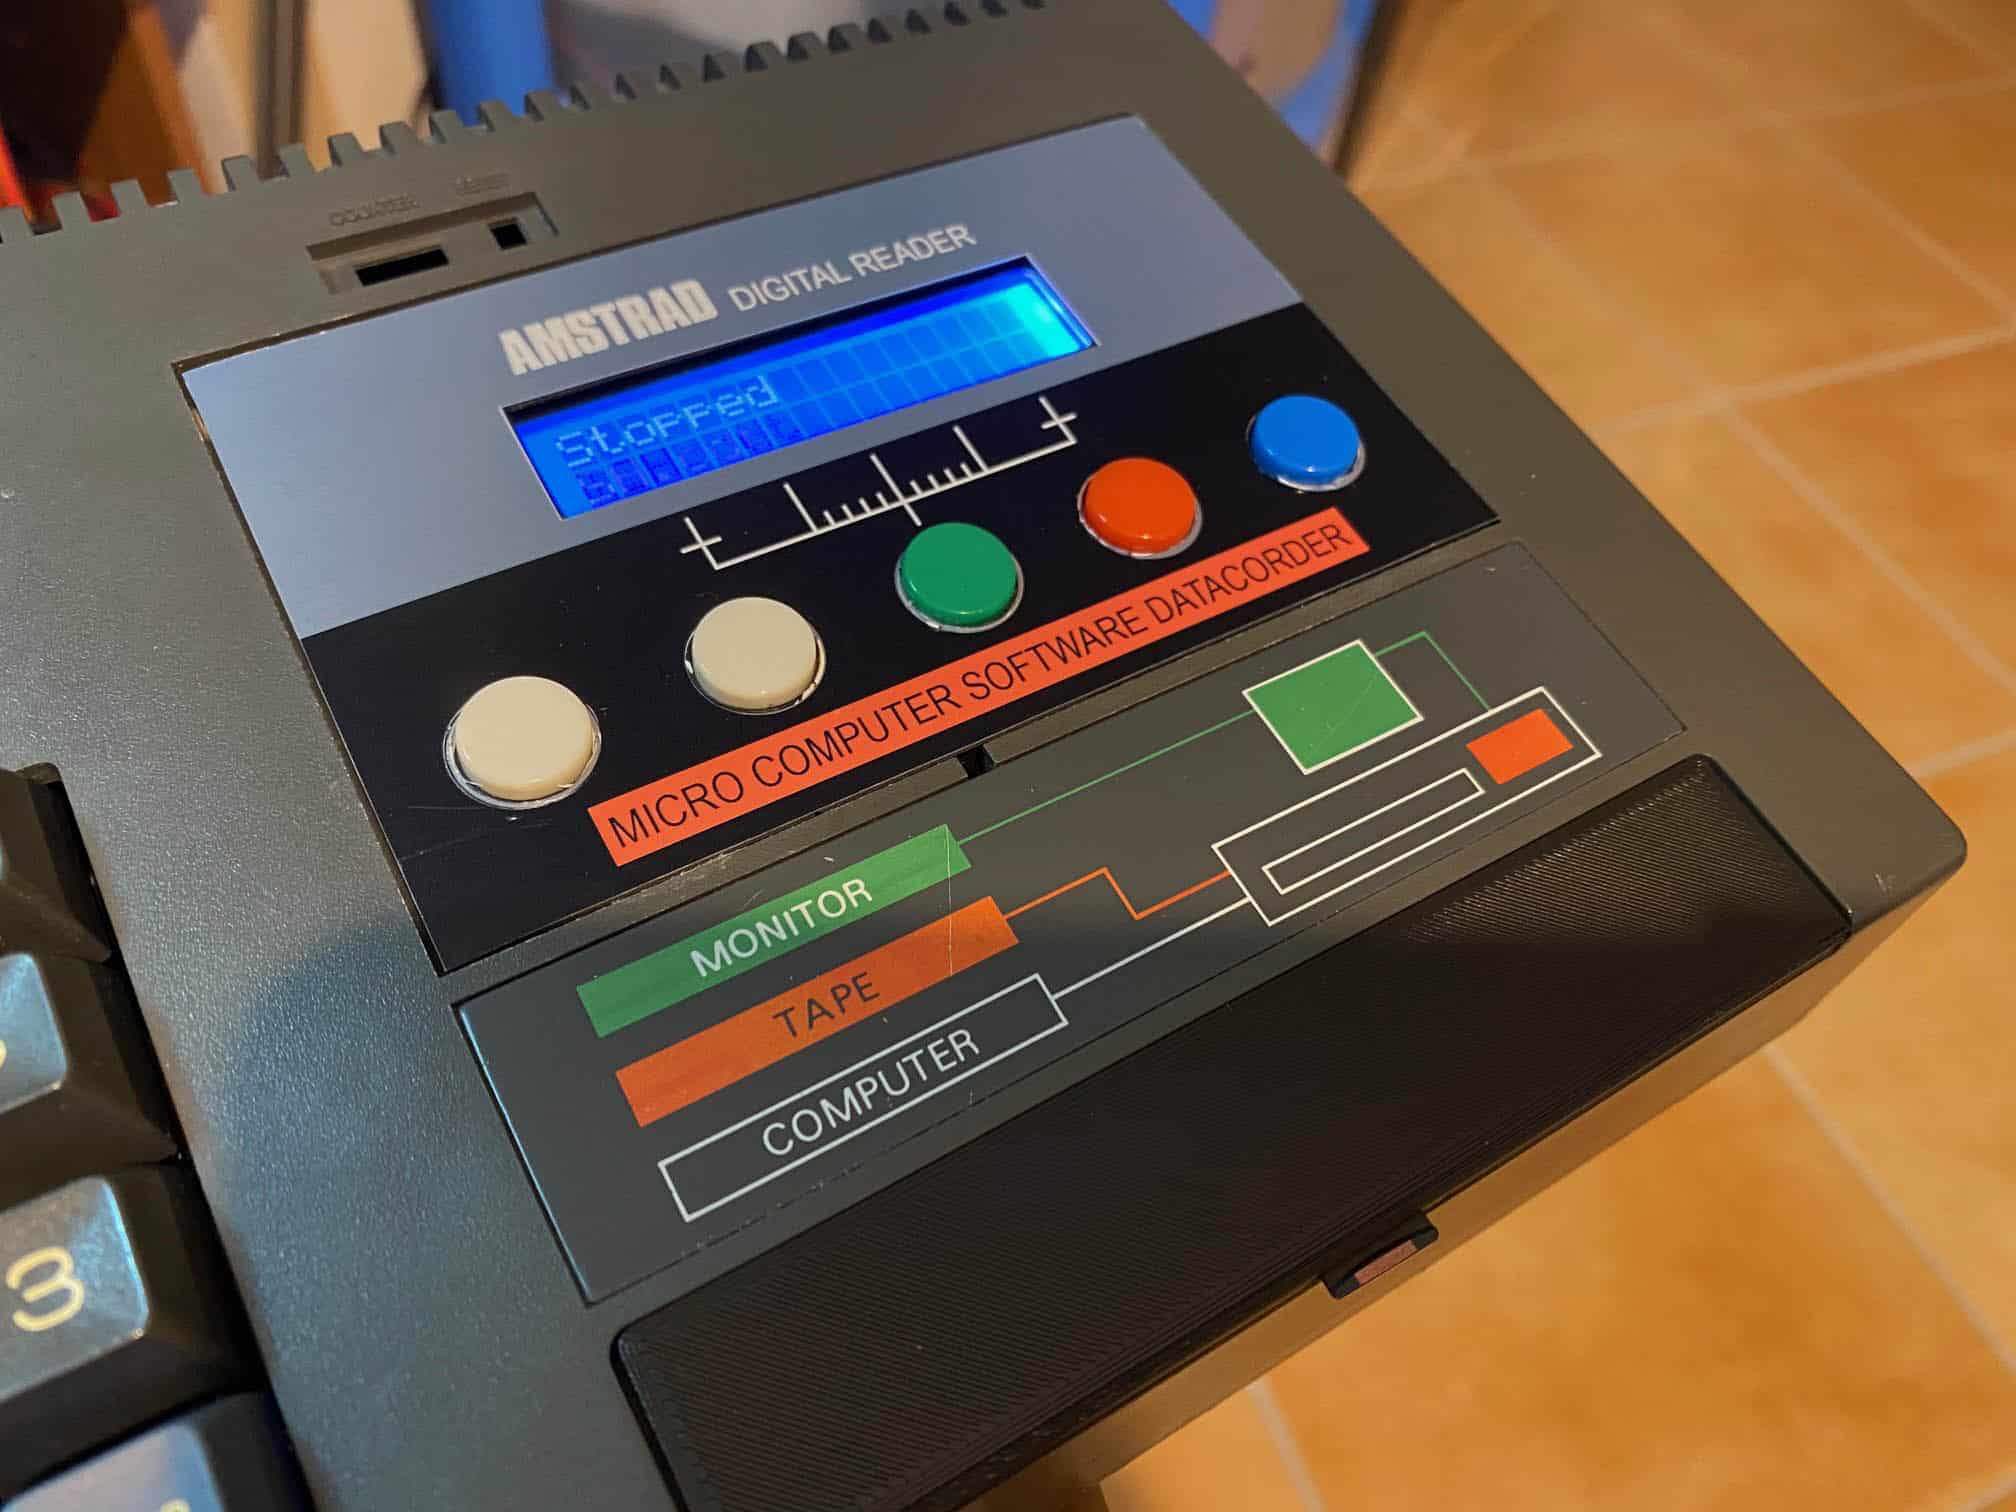
    What a great project – I stumbled upon this when looking for something exactly like this for a CPC464 I have without a tape deck. I was going to follow the instructions but noticed that the buttons on the Eagle PCB are arranged differently than the STL file for the 3D printed cover? The UP/DOWN buttons specifically. Also, it the sticker that you created available for download?

    Sorry for all of the questions – I just think it’s a really neat project and would love to give my CPC464 the same treatment!

    Thanks,

    Mark.

    Rispondi
    • Mirco G ha detto:
      31 Agosto 2023 alle 11:15

      Hi Mark,
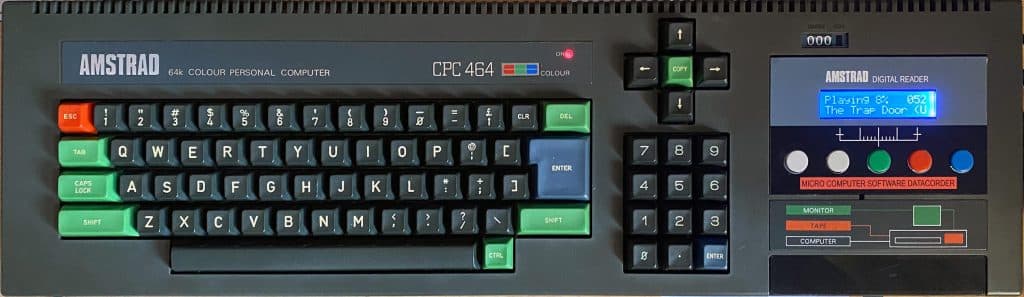
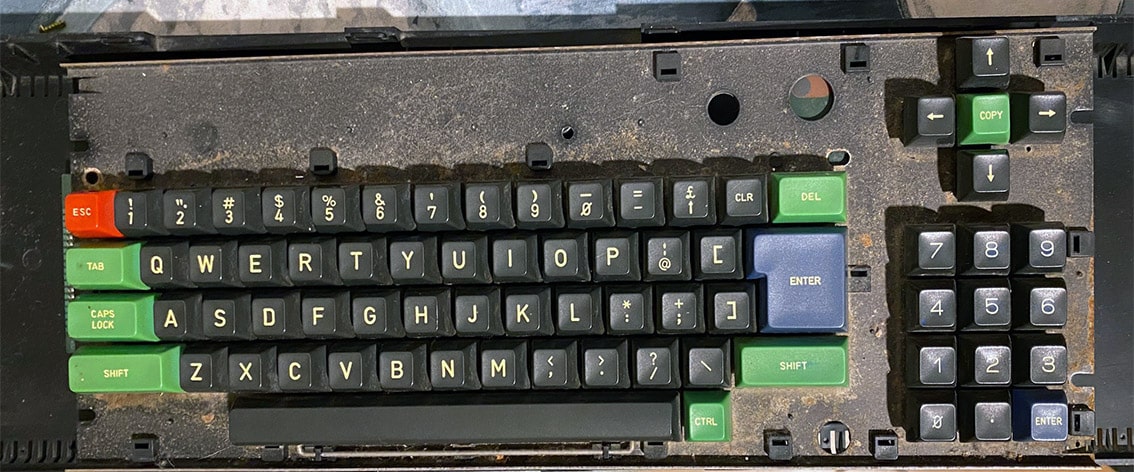
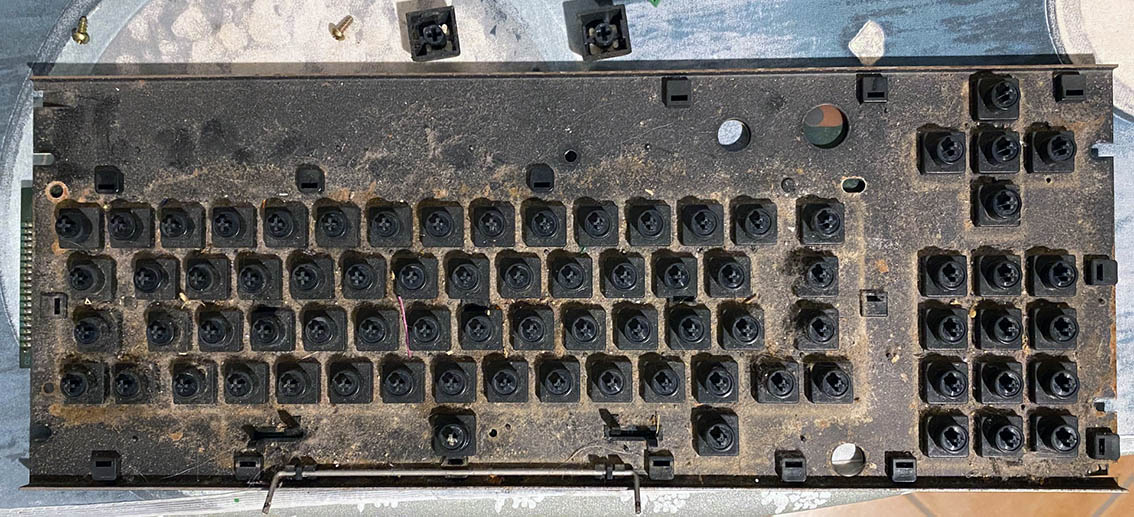
      the layout of the keys is different because that board is not to be put directly under the recorder, the big keys I connected on a stripboard (basetta millefori in italian) and with wires connected to Arduino.
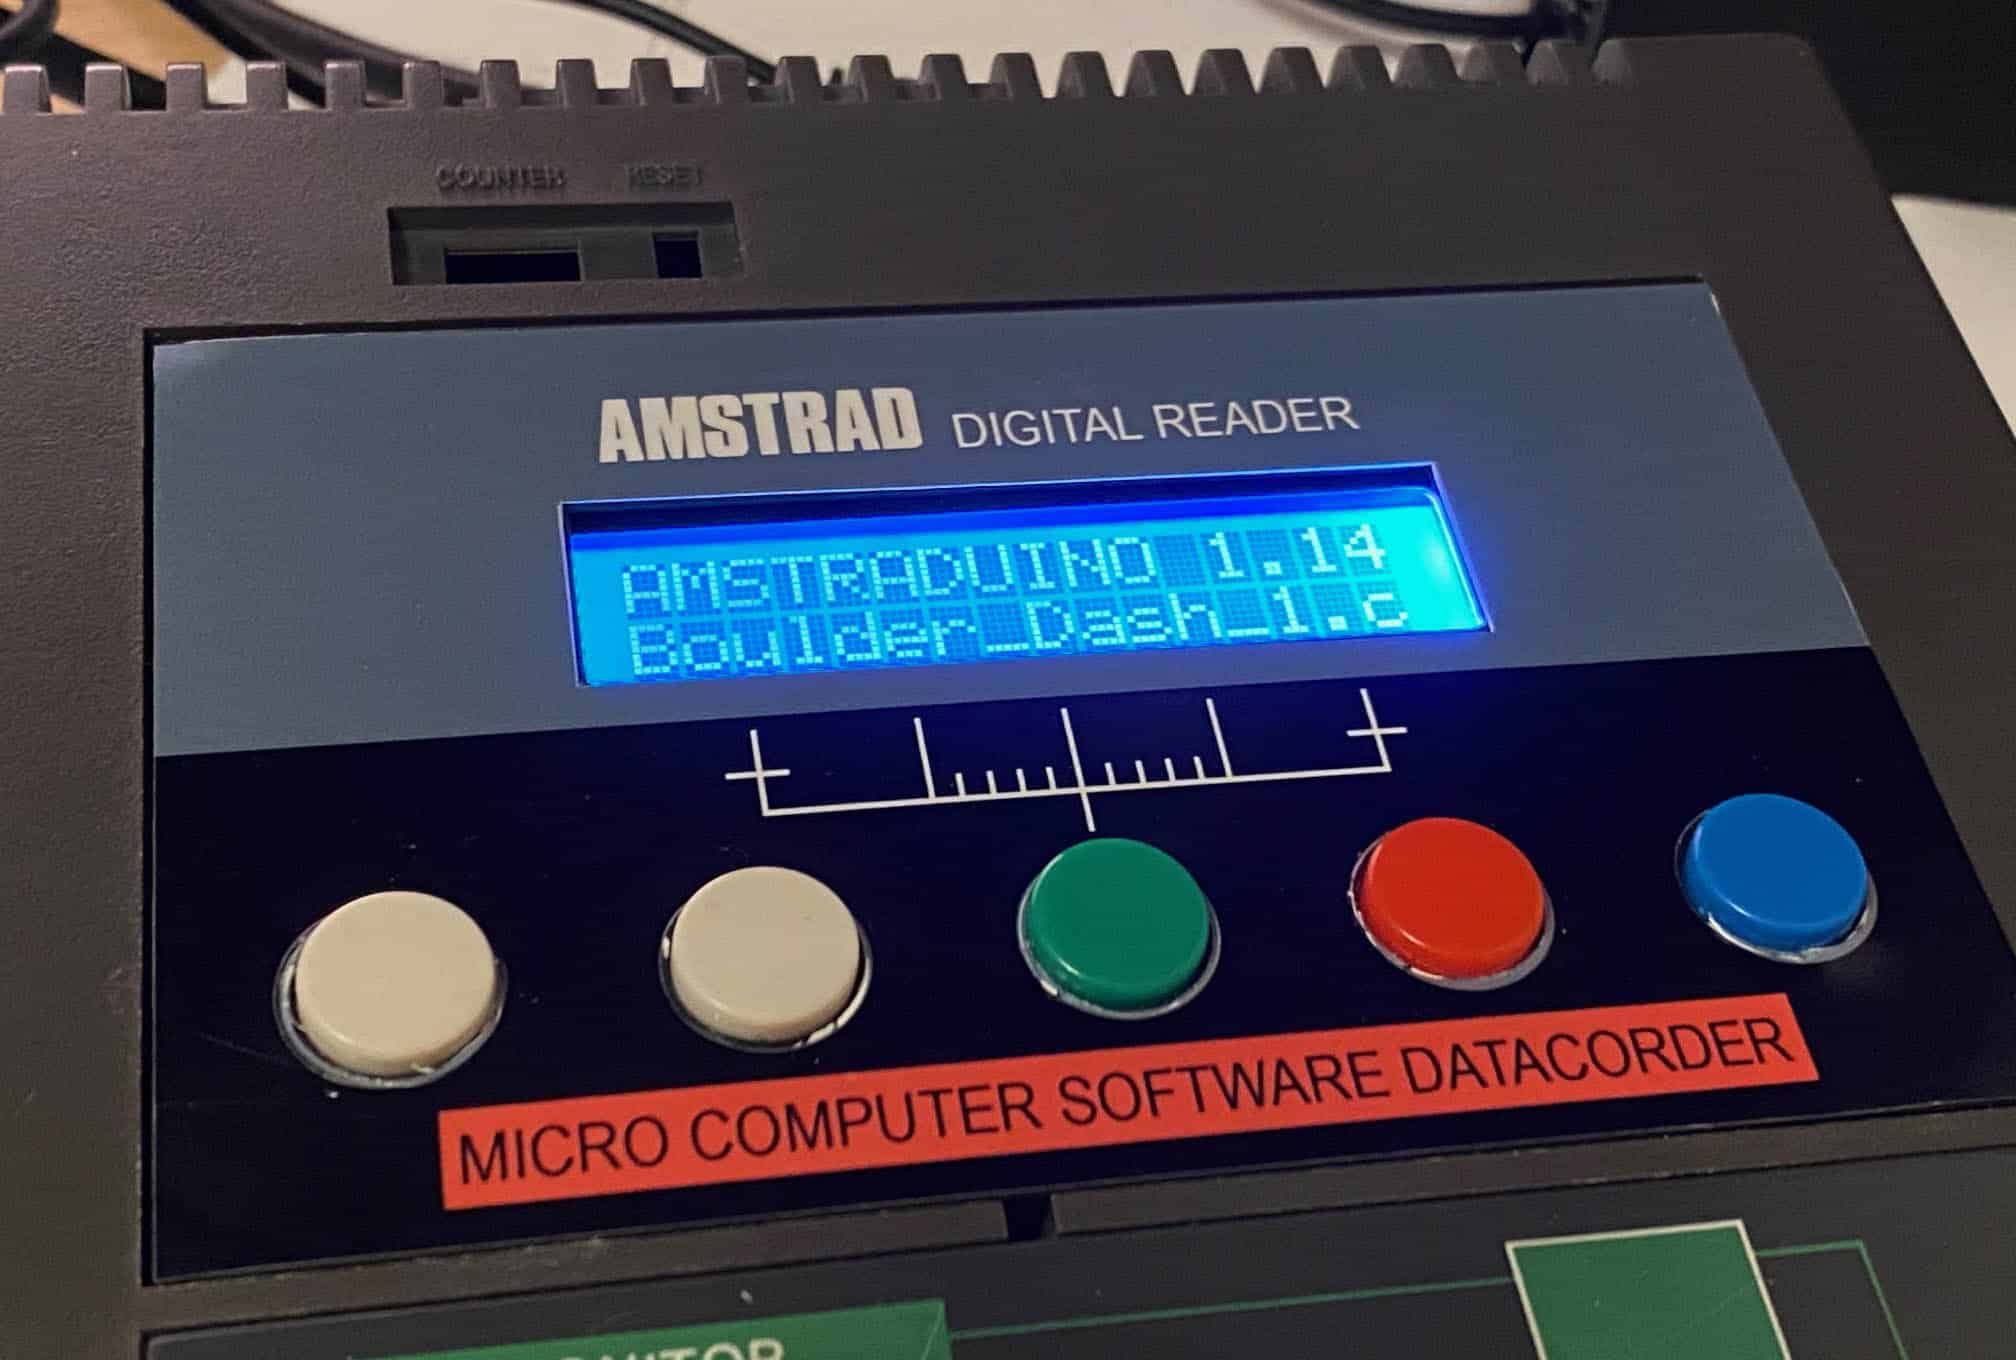
      If you look at the pictures you can see that the pcb has only Arduino and some little more components, the remaining components was connected with wires, even the microSD connector was glued under the black plastic.
      I had done a very handmade job, you could make a more compact pcb and find better solutions for the components and keys.
      For the graphics I will check if I find it in some folder and if so I will post it on the article.
      Best regards,
      Mirco.

      Rispondi
    • Mirco G ha detto:
      1 Settembre 2023 alle 17:08

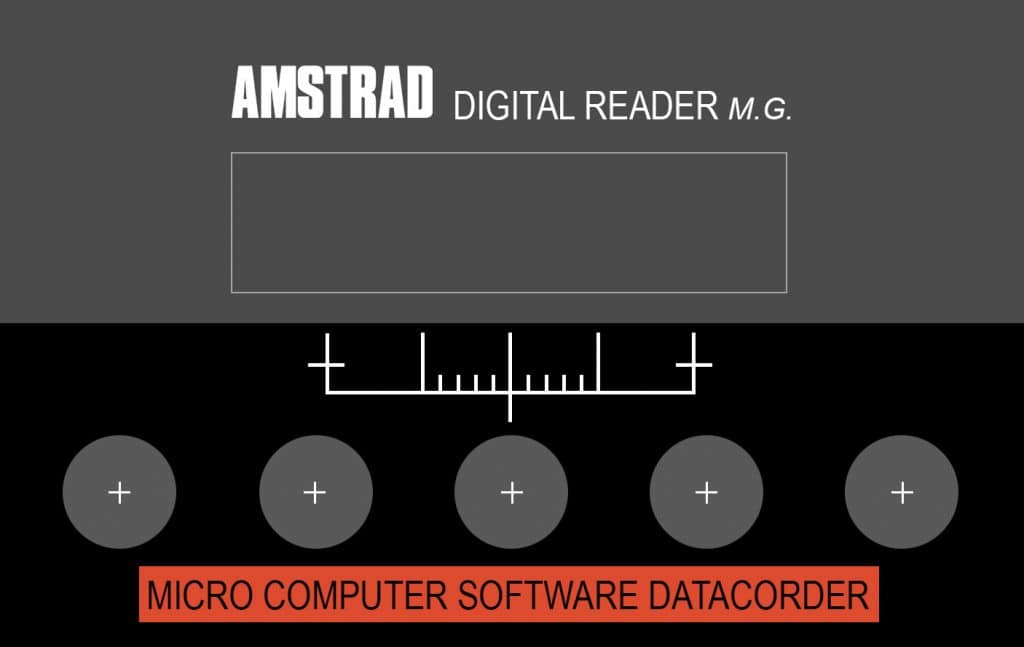
      I have updated the article and added the button to download the sticker graphic, with or without the Retrofixer logo.

      Rispondi

Lascia un commento Annulla risposta

Il tuo indirizzo email non sarà pubblicato. I campi obbligatori sono contrassegnati *

Questo sito usa Akismet per ridurre lo spam. Scopri come i tuoi dati vengono elaborati.

logo
RETRO FIXER ©2021 Tutti i marchi riportati appartengono ai legittimi proprietari.
Cookie Policy - Privacy Policy
Language
  • en_GB
  • it_IT
  • support@retrofixer-it.preview-domain.com
Usiamo i cookies strettamente necessari per garantire una esperienza ottimale nella navigazione del sito. Cliccando su "Accetta tutto", ci consenti di usare tutti i cookies. Puoi sempre rivedere il consenso cliccando su Cookie settings.
We use cookies on our website to give you the most relevant experience by remembering your preferences and repeat visits. By clicking “Accept All”, you consent to the use of ALL the cookies. However, you may visit "Cookie Settings" to provide a controlled consent.
Cookie SettingsAccetta tutto - Accept All
Manage consent

Privacy Overview

This website uses cookies to improve your experience while you navigate through the website. Out of these, the cookies that are categorized as necessary are stored on your browser as they are essential for the working of basic functionalities of the website. We also use third-party cookies that help us analyze and understand how you use this website. These cookies will be stored in your browser only with your consent. You also have the option to opt-out of these cookies. But opting out of some of these cookies may affect your browsing experience.
Necessary
Sempre abilitato
Necessary cookies are absolutely essential for the website to function properly. These cookies ensure basic functionalities and security features of the website, anonymously.
BiscottoDurataDescrizione
cookielawinfo-checkbox-analytics11 monthsThis cookie is set by GDPR Cookie Consent plugin. The cookie is used to store the user consent for the cookies in the category "Analytics".
cookielawinfo-checkbox-functional11 monthsThe cookie is set by GDPR cookie consent to record the user consent for the cookies in the category "Functional".
cookielawinfo-checkbox-necessary11 monthsThis cookie is set by GDPR Cookie Consent plugin. The cookies is used to store the user consent for the cookies in the category "Necessary".
cookielawinfo-checkbox-others11 monthsThis cookie is set by GDPR Cookie Consent plugin. The cookie is used to store the user consent for the cookies in the category "Other.
cookielawinfo-checkbox-performance11 monthsThis cookie is set by GDPR Cookie Consent plugin. The cookie is used to store the user consent for the cookies in the category "Performance".
viewed_cookie_policy11 monthsThe cookie is set by the GDPR Cookie Consent plugin and is used to store whether or not user has consented to the use of cookies. It does not store any personal data.
Functional
Functional cookies help to perform certain functionalities like sharing the content of the website on social media platforms, collect feedbacks, and other third-party features.
Performance
Performance cookies are used to understand and analyze the key performance indexes of the website which helps in delivering a better user experience for the visitors.
Analytics
Analytical cookies are used to understand how visitors interact with the website. These cookies help provide information on metrics the number of visitors, bounce rate, traffic source, etc.
Advertisement
Advertisement cookies are used to provide visitors with relevant ads and marketing campaigns. These cookies track visitors across websites and collect information to provide customized ads.
Others
Other uncategorized cookies are those that are being analyzed and have not been classified into a category as yet.
ACCETTA E SALVA
Offerto da CookieYes Logo
Enjoy and Subscribe

Ti piace Retrofixer? vuoi aiutarci a mantenere tutto questo gratuito? Do you like Retrofixer? Would you like to help us keep this free?

Iscriviti al canale YouTube Please subscribe to our channel