Micro Arcade Gamez mod
7 September 2022
Jiminy Cricket
29 October 2022One of the limitations in Commodore's 8bit computer series is that it only has one FIRE! Key.
Initially the games were not complex and one key was enough, then with the advent of arcade machines and games with multiple inputs we began to see the difficulty of playing them at home with the joystick and using the keyboard for additional keys. It would have taken just one more key to solve the problem, games often used 2 keys, rarely 3 or more.
Well now it is possible to add more "FIRE" to our beloved Commodore!
How?
Actually it was already in the past but they never did, indeed they did but later, it was added on the Commodore 64 GS using the potX function used for reading analog paddles.
Operation
Let's see now how the joystick reading works in the Commodore 64 (also applies to Vic20, C128)
Next to it is the pinout of the joystick port where we find all the direction signals, the fire button and the two analog axes (x, y) for the paddle. We don't have any other pins to use !. When they finally decided to put the second Fire, they used the signal of the potentiometer X. This pin is an analog input controlled by the SID, already, contrary to the digital signals that are managed by the CIA, this pin is connected to the SID port which in addition to the audio functionality has the task of interpreting the level of this pin from 0v to 5v. In the case of the second Fire using this pin (nr. 9) the connection is made with the 5v instead of the GND used in the other signals, this is because the pin is kept at a low level if not connected and in order to understand if it has been pressed the key will need to be given a voltage.


There are not many games that use the second key, but some are already born with this feature and in order not to upset all the games that require additional keys it would be better to continue on this path!
Therefore the third key should be connected to the potentiometer pin Y.
With this technique we could connect many more keys, since we are using an analog signal, we could make a divider with resistors so that each key gives a different voltage and if we use precision resistors it will be easier to read the value. Let's not complicate our life too much! there are not many games that use more than one key and 2 are enough to cover the 99% of the games on the C64.
SAVE FREE ALL!
Now that we know how the second key on the C64 works we can build ourselves a joystick with this functionality!
Too bad that there are few games programmed to work with this system .. so what do you do?
Fortunately, Salvo Cristaldi has thought of it and is "hacking" with the games of 64 adding this new and beautiful feature!
Do you think how nice it is to be able to play with 1942 and be able to dodge the enemies by pressing the nearby button on the joystick instead of having to reach out to press space or hold a second joystick in port 1 !!!
In Commando we can drop the bombs in a split second and keep firing.
The games will resemble more (in terms of gameplay) those in the arcade.
Ok, now you want to know where to find these modified games right?
Here is the page of GitHub where to find all converted files.


Not just 2 Fire!
In the Salvo page you will find the scheme to make a joystick with 5 buttons and an additional button for the “up” direction, very useful in games that use the joystick lever to jump.
If all this is not an understatement, Salvo is also converting some games that are unusable on the C64GS due to the lack of the keyboard.
As you know this Commodore pseudo console, it is nothing more than a simple C64C deprived of its keyboard and some components no longer used such as the management of the cassette holder, etc.
Many games written for 64 required the press of a button to start, the choice of players, the difficulty level, or whatever.
All this was not possible without the keyboard and the last titles after the release of the 64GS were adapted to make these choices with the joystick. But those before? simple you could not play with it.
We build the joystick
Now stop chatting and let's move on to the construction of the joystick, indeed if you want to see how it was built follow this video.
This is all the material we need:
(but first ... the protection!)
Everything you see on the site was born from the passion for these computers that taught us (at least to those of my generation) programming and "given a job" often what we do today.
If you like content and to contribute to the growth of the channel, articles etc. subscribe to the channel! it's free and we need it to continue creating content that, like knowing, takes time and more !.
Joystick and buttons
For these components, almost everything that is found under the name of Arcade kit or even taken separately individually is suitable. I used the kit to avoid taking them all separately, but by doing so we will have something left over like the USB converter and some keys.
The important thing is to have a clean contact on the button because the basic FIRE of the C64 must interrupt the GND while the two additional keys connected to potX and potY must interrupt the 5V. The joystick often has a common wire (and that's fine) to which we will bring the GND and based on the direction we will find this signal in the pin connected to the relative microswitch.
These keys also have lighting that you can not connect or if you do not want it better take them without and save a little.
Another particular thing about this kit is that the button has a 3-pole connector where one is the GND, one is the + 5V for the LED and the central pin is the output of the button but it is connected internally with the + 5V and therefore not it is fine for the native FIRE of the C64. To overcome this problem, I removed the LED resistor and on the pin where the LED is connected I soldered a flying resistor powered at 5V so as to leave the button pin that would have been the + unused and I used it as GND or + 5V to depending on the case.
If the button has 2 or 4 pins this modification is not necessary because the signals are already separated.
If you use lighting, put a high enough resistance on the leds so as not to charge the C64 too much. (680ohm can fit)

This kit can be found on:
Amazon link
Link Aliexpress
Joystick extension
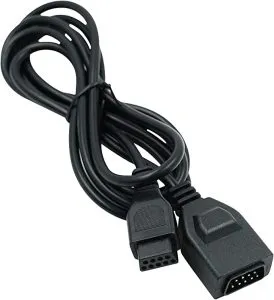
This extension cable would be optional if you want to make your own cable and have a female DB9 socket.
Otherwise, in short, cut the large part where the pins are (male side) and find the wire-pin correspondence in order to connect the wires to the correct position of the joystick. If you want to reuse the extension or don't want to go crazy beating all 9 wires, use a solder DB9 female connector like me. On the connector you will solder all the joystick cables in the correct pins and all you have to do is connect the connector to the extension cable.
3D houses
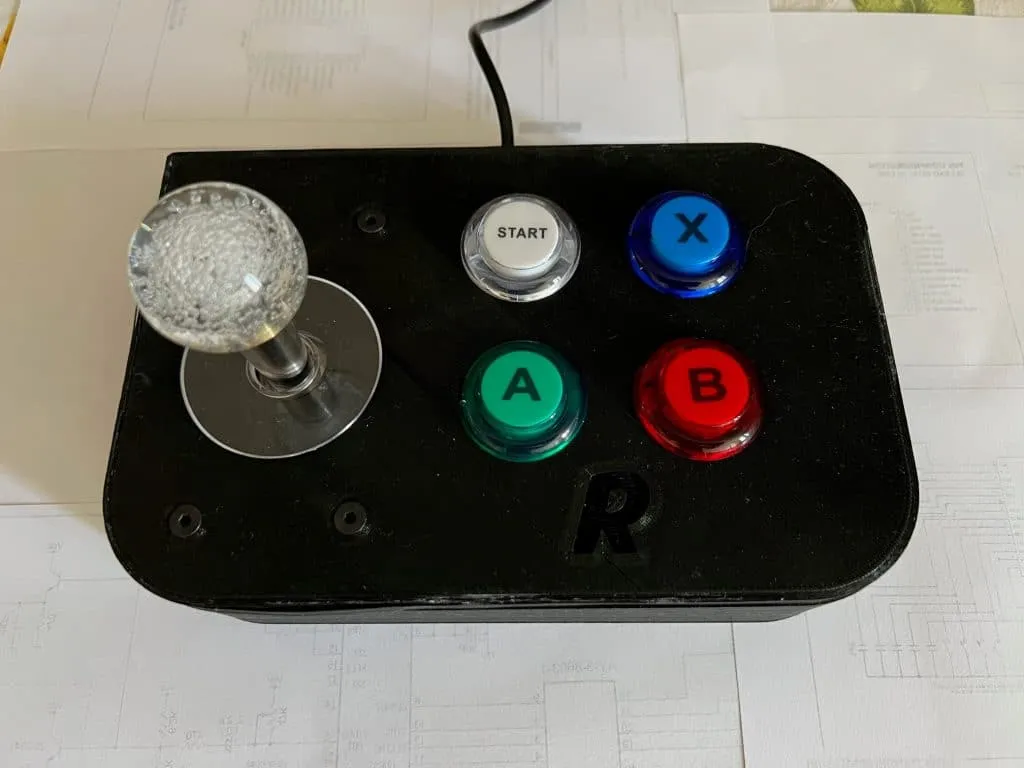
The link to the joystick project as in the photo is here:
https://www.thingiverse.com/thing:5568052
4 keys of which the first at the top "start" is a combination of the lever (right + left) impossible to do with a joystick and therefore used as an "additional key".
Since the combinations up + down and right + left block the use of the joystick, it is not convenient to use them as keys, while it could be useful to have the “up” direction on a button so that you can use it to jump.
If you don't have a 3D printer you can always rely on:
The joystick connection diagram can be found on Salvo's GitHub page but I'll insert it for convenience:

If you want to use the select and start button as Salvo has thought of them, you need to insert 2 diodes per button as shown in the diagram, otherwise the direction will also control the other making it impossible to go in one direction only.




2 Comments
Dove posso contattarti per un joistick? Grazie
Salvatore
Ciao puoi scrivermi sul form della pagina contatti oppure su info@retrofixer.it