As you already know if you have seen the related video on Nintendo Entertainment System protections in our youtube channel, the Famicom cartridges (Japanese NES) have a different number of pins than those of the NES released in USA/Europe; there are adapters to solve this problem, equipped with the famous CIC to bypass the region. However, there is a BUT in these adapters as you can see in this image:
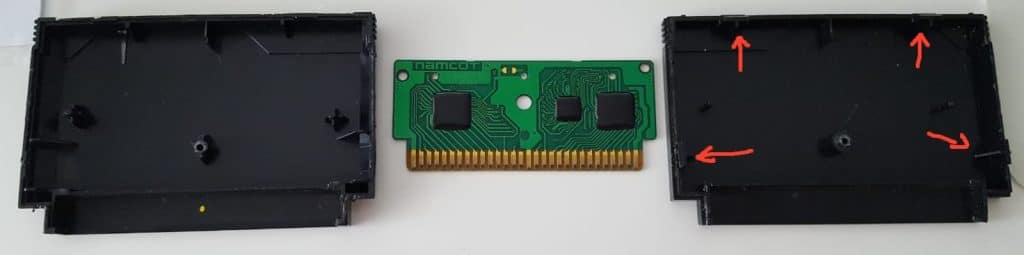
In the adapter at the top the "corners" of the PCB are MISSING (which I have hand-drawn in red) which are instead present in the adapter at the bottom; what changes ? Change that the one below DOES NOT fit into the Famicom cartridges because those "corners" touch the plastic edge of the cartridge (see photo below):
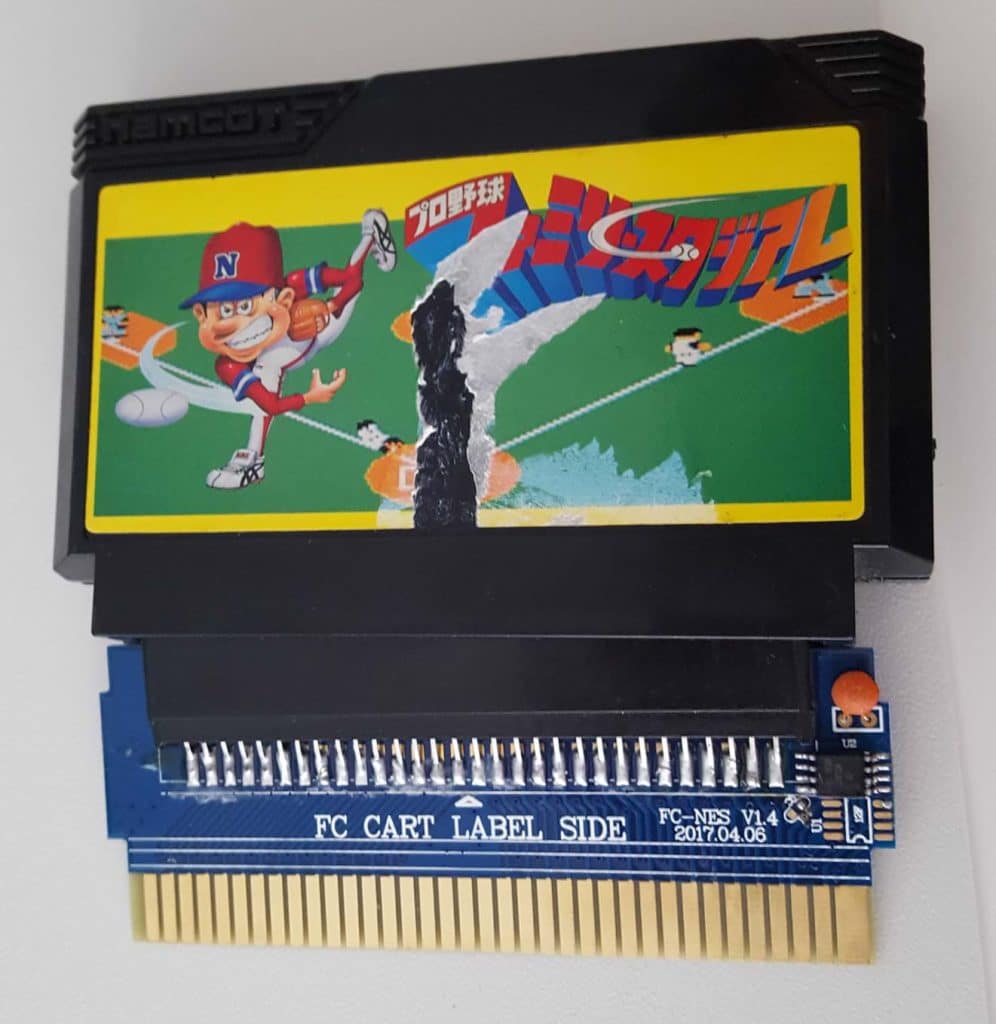
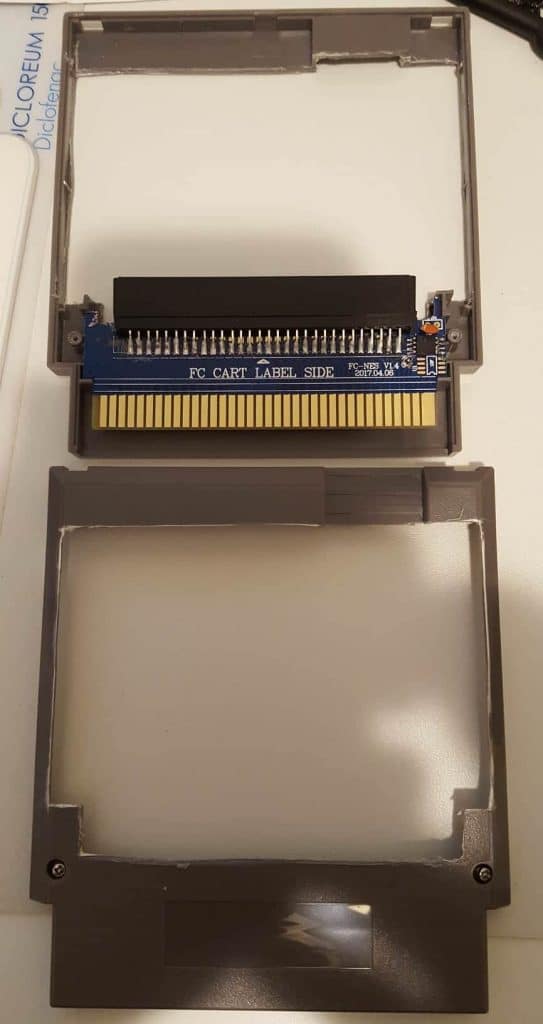
This can be "solved" by opening the cartridge (it has 4 plastic tabs, 1 on each short side and 2 on the upper long side):
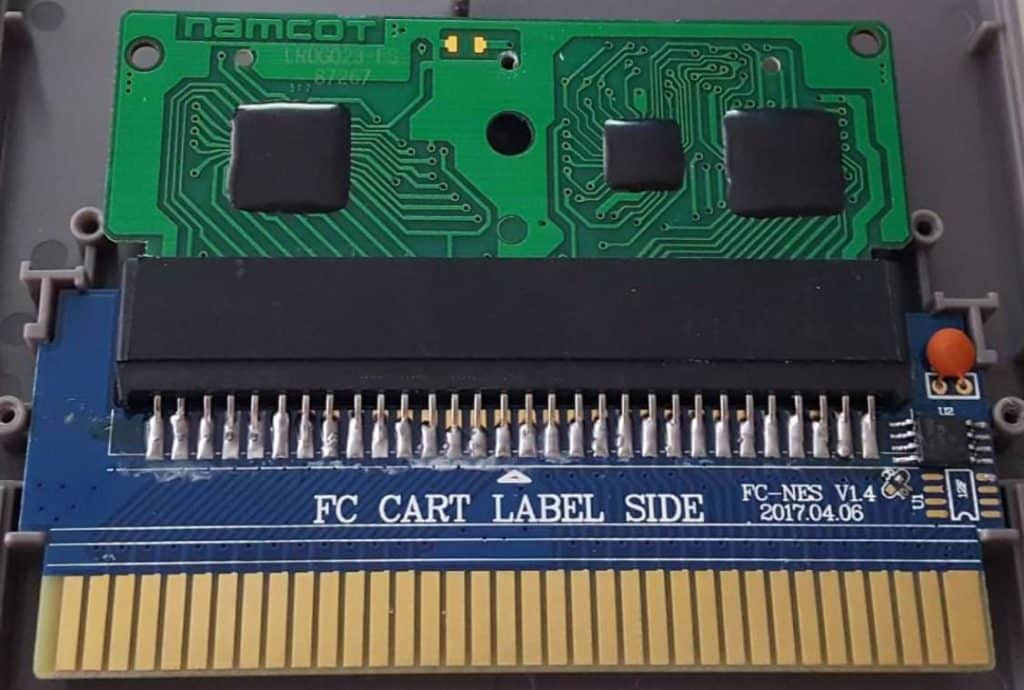
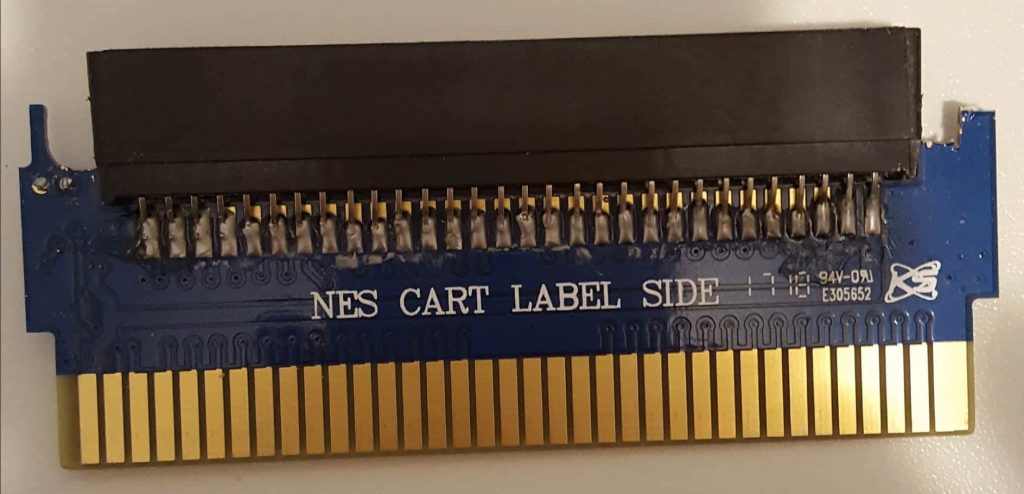
extracting the PCB and inserting it directly into the adapter in this way (the face of the PCB with the game chips goes on the "FC CART LABEL SIDE"):
NOTE
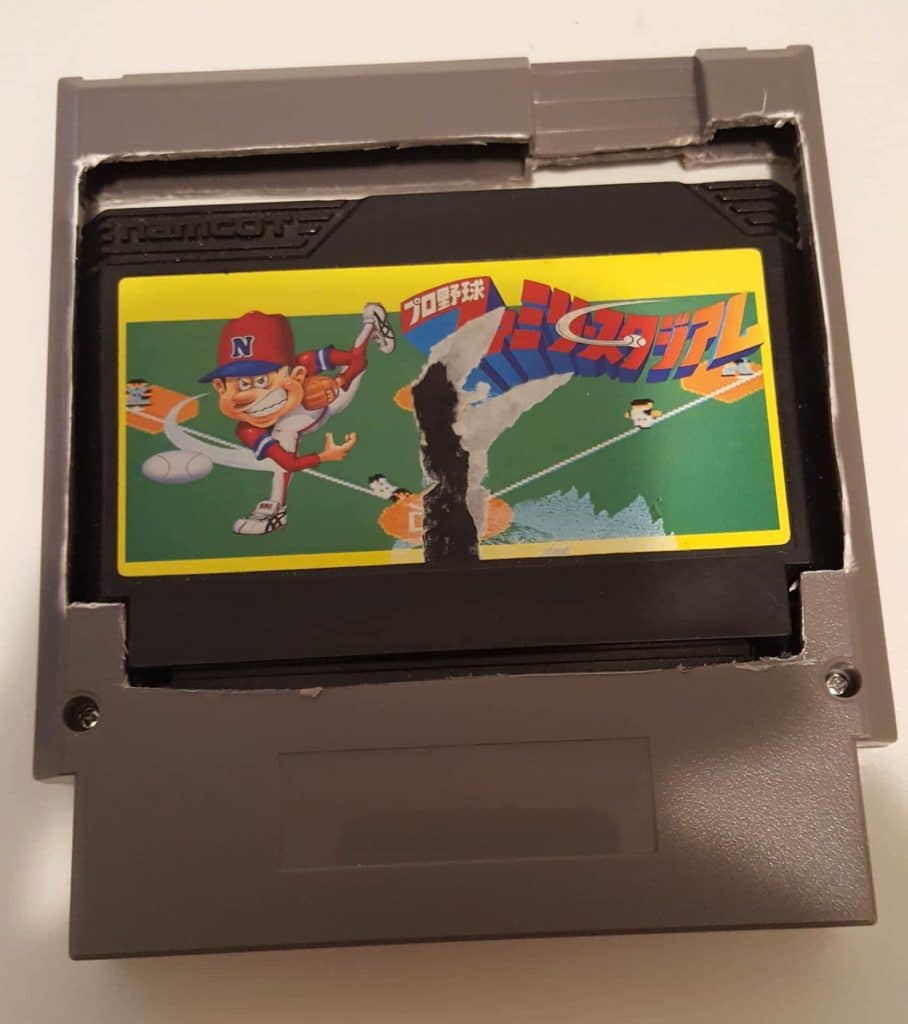
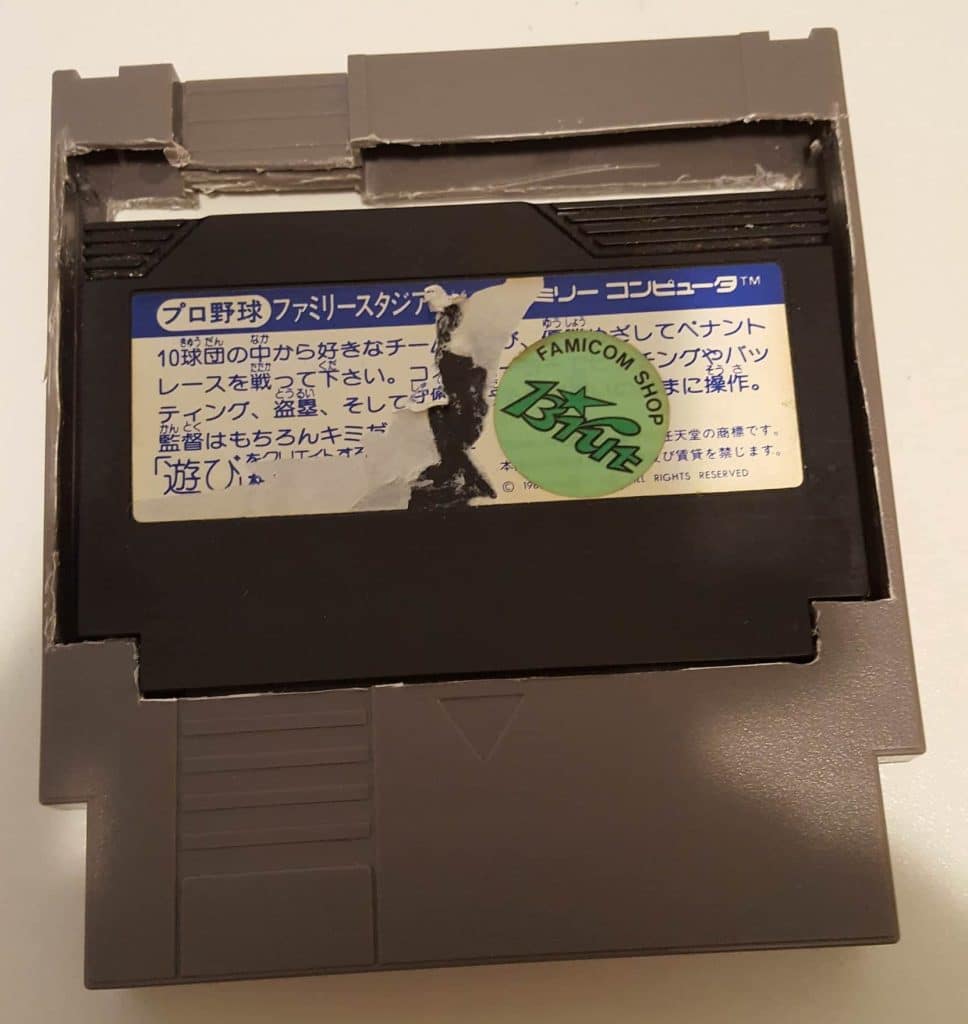
Famicom cartridges don't have screws but I happened to have the cartridge in the photo you saw above which had the central plastic pin glued to its counterpart.
But who would want to open/destroy an original cartridge? Especially if some are glued to the central internal pin, thus requiring physical breakage (see photos above)? Not many I guess…
So why are there basically 2 physical types of these adapters? I asked myself the question and I think the answer is this:
As you can see from the photo, the one with the "corners" fits perfectly into a Chinese NES cartridge case thus making it easy to convert/taco a JAP cartridge (which must necessarily be opened and/or crashed if it is glued) in a US NES /EUR without adapters being visible from the outside; the thing seems to have even been done by Nintendo itself in the release of some US / EUR games in which it was foundprecisely one of these adapters directly inserted by the big N itself (to recycle cartridges without having to recreate them in the new 72 pin format?). The model without "corners" can also be slipped into these plastic cases, but it is much more mobile and less stable.
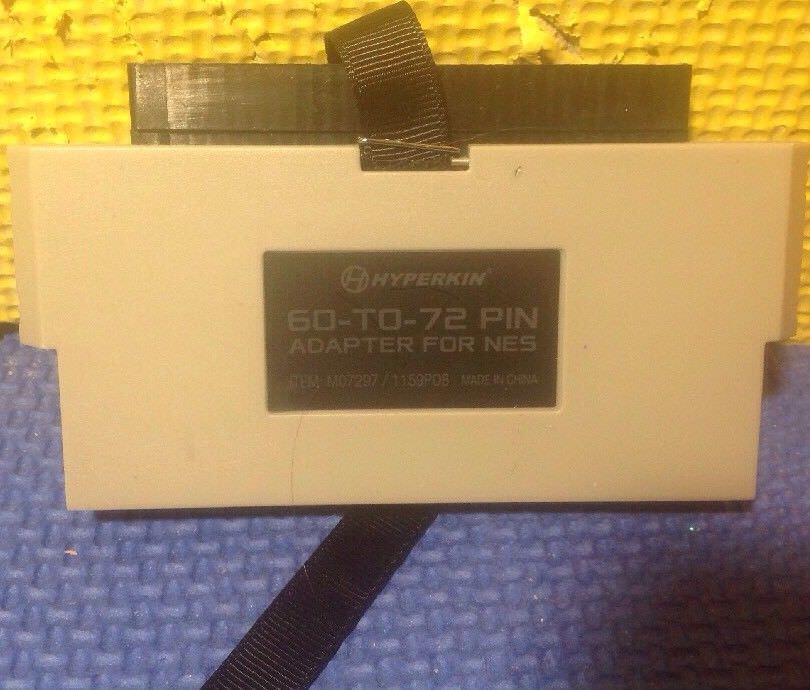
Instead, those without "nooks" allow them to be inserted directly under a 60-pin cartridge, immediately transforming it into a 72-pin cartridge without having to open anything. Some already have their protective plastic shell and still others also have a "cord" to make it easier to extract the game inserted with the adapter.
LET'S BUILD AN ADAPTER!
Having both an empty cartridge and a cartridge adapter, I wanted to try to create a sort of convenient "universal" adapter for 60-pin cartridges (Famicom) on 72-pin consoles (NES); using the trusty dremel (circular saw and cylindrical metal grinder) and a "professional" cutter (thick rigid blade, not the "flexible" ones that cost a few cents) the result was this:
Basically I cut, as you can see in the photo, part of the "corners" to let the cartridge enter the adapter slot and I bent the orange capacitor on the right towards the chip to avoid damaging it during the work (and so I then left):
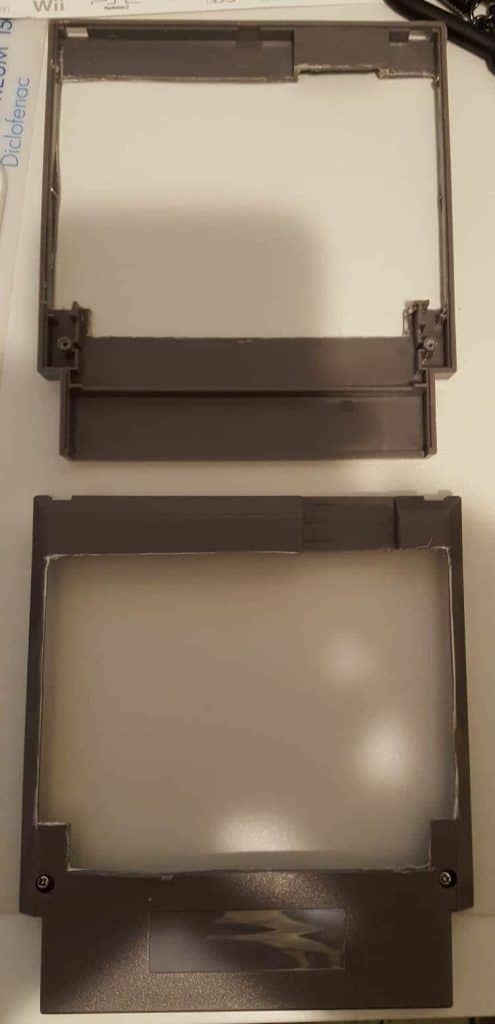
I then cut the plastic case to fit the cartridge (the Famicom ones are as thick as the NES ones but are narrower and lower) leaving a bit more space at the top to make it fit easily:
The "front" of the Famicom cartridge goes on the lower side of the cut cartridge (it will be the face that will be placed in the console slot - see last photo above) while the side of the cut cartridge that has the triangle goes on the upper side (it will be the side that it will be seen from the outside by inserting the cartridge into the console).
We use cookies strictly necessary to ensure an optimal experience in browsing the site. By clicking on "Accept all", you allow us to use all cookies. You can always review your consent by clicking on Cookie settings. We use cookies on our website to give you the most relevant experience by remembering your preferences and repeat visits. By clicking “Accept All”, you consent to the use of ALL the cookies. However, you may visit "Cookie Settings" to provide a controlled consent.
This website uses cookies to improve your experience while you navigate through the website. Out of these, the cookies that are categorized as necessary are stored on your browser as they are essential for the working of basic functionalities of the website. We also use third-party cookies that help us analyze and understand how you use this website. These cookies will be stored in your browser only with your consent. You also have the option to opt-out of these cookies. But opting out of some of these cookies may affect your browsing experience.
Necessary cookies are absolutely essential for the website to function properly. These cookies ensure basic functionalities and security features of the website, anonymously.
Cookie
Durata
Descrizione
cookielawinfo-checkbox-analytics
11 months
This cookie is set by GDPR Cookie Consent plugin. The cookie is used to store the user consent for the cookies in the category "Analytics".
cookielawinfo-checkbox-functional
11 months
The cookie is set by GDPR cookie consent to record the user consent for the cookies in the category "Functional".
cookielawinfo-checkbox-necessary
11 months
This cookie is set by GDPR Cookie Consent plugin. The cookies is used to store the user consent for the cookies in the category "Necessary".
cookielawinfo-checkbox-others
11 months
This cookie is set by GDPR Cookie Consent plugin. The cookie is used to store the user consent for the cookies in the category "Other.
cookielawinfo-checkbox-performance
11 months
This cookie is set by GDPR Cookie Consent plugin. The cookie is used to store the user consent for the cookies in the category "Performance".
viewed_cookie_policy
11 months
The cookie is set by the GDPR Cookie Consent plugin and is used to store whether or not user has consented to the use of cookies. It does not store any personal data.
Functional cookies help to perform certain functionalities like sharing the content of the website on social media platforms, collect feedbacks, and other third-party features.
Performance cookies are used to understand and analyze the key performance indexes of the website which helps in delivering a better user experience for the visitors.
Analytical cookies are used to understand how visitors interact with the website. These cookies help provide information on metrics the number of visitors, bounce rate, traffic source, etc.
Advertisement cookies are used to provide visitors with relevant ads and marketing campaigns. These cookies track visitors across websites and collect information to provide customized ads.


