Sega Saturn Blue screen
25 June 2021
Max Machine composite mod
18 September 2021Dopo una bella caccia su Internet sono riuscito a trovare ad un “prezzo decente” un Vectrex.. bello si ma non funzionante 🙁
ehh, you can't have everything in life !.
Too bad that once these non-working consoles were sold like junk and you could buy them for less than 40 € now even in bad shape they cost 4-5 times as much. Let's not talk about the working ones that easily double the price.
ATTENTION! THIS CONSOLE NOT ONLY HAS AN INTERNAL POWER SUPPLY AND SO IT IS EASY TO FIND THE 230V BUT USES HIGH VOLTAGE FOR THE CATHODE TUBE, DIFFERENT KV, SO TAKE ALL POSSIBLE PRECAUTIONS OR DO NOT OPEN IT.
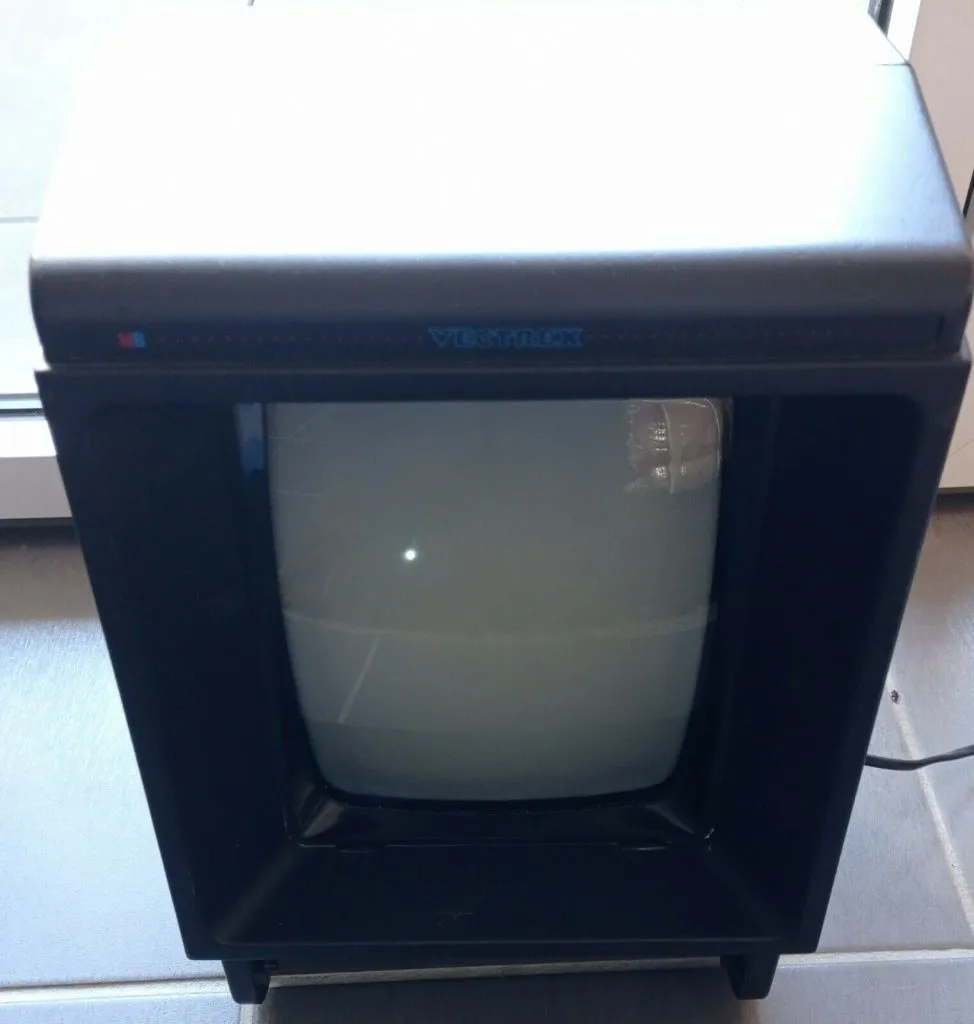
Well that said let's see what we can find with a console with a fixed point in the screen.
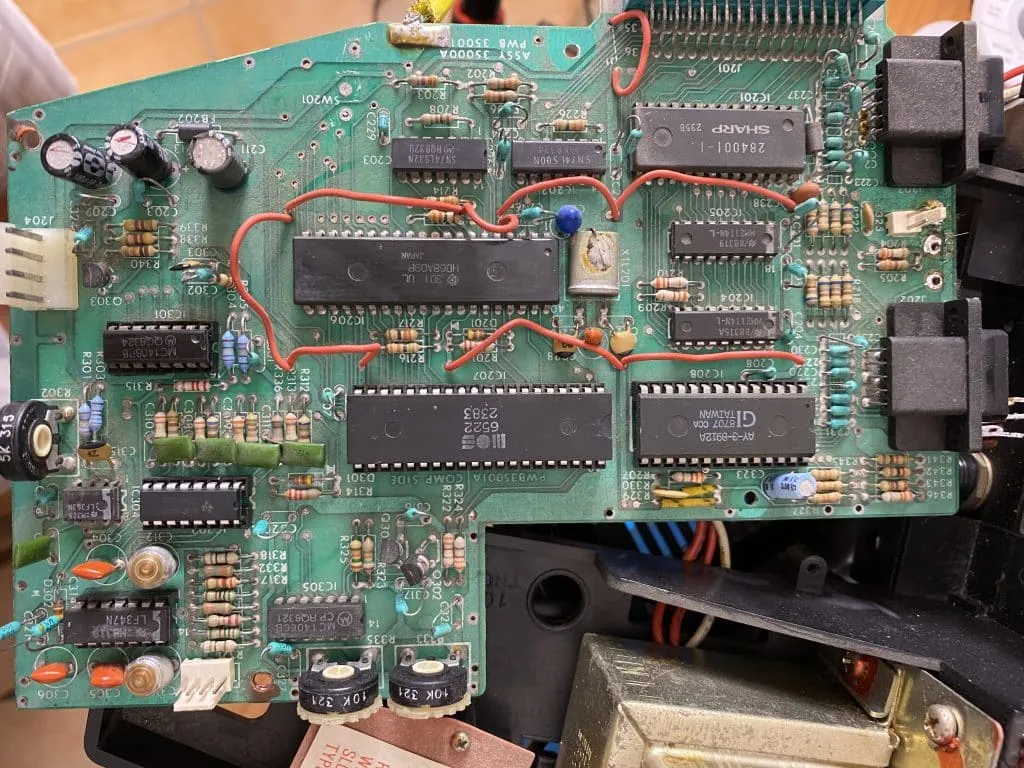
Inside the Vectrex we find 2 cards, one called the power board because it is the posting one that powers the other card and the monitor, plus other small functions.
The second board is called the logic board because it is actually the one that mounts the processor and all the control logic.
If the fault was on the power board, it is likely that no video signal will be seen or if the fixed point is present, the sound of the game is likely to be heard. This defect could however refer to a video signal control chip present on the logic board (eg the dac).
A failure on the logic board is more likely not to start the game, in fact on this console we find a game on the rom without having to use any cartridge.
In this case we will not hear any sound but we will only see the white dot on the screen
Search for the fault
Let's start to see what the problem can be and first measure the voltages to rule out a problem on the power supplies.
Below the board as it appeared immediately after disassembly, voltages measured on the connector and all perfect -5V, GND, + 5V, -13V.
Well, being able to count on the oscilloscope I was able to test the main suspect which in my opinion was the processor, while from a troubleshotting guide I found other chips involved, but I didn't even have the audio and so I didn't follow it.
If you don't have an oscilloscope, you can also perform these tests with a simple logic probe.
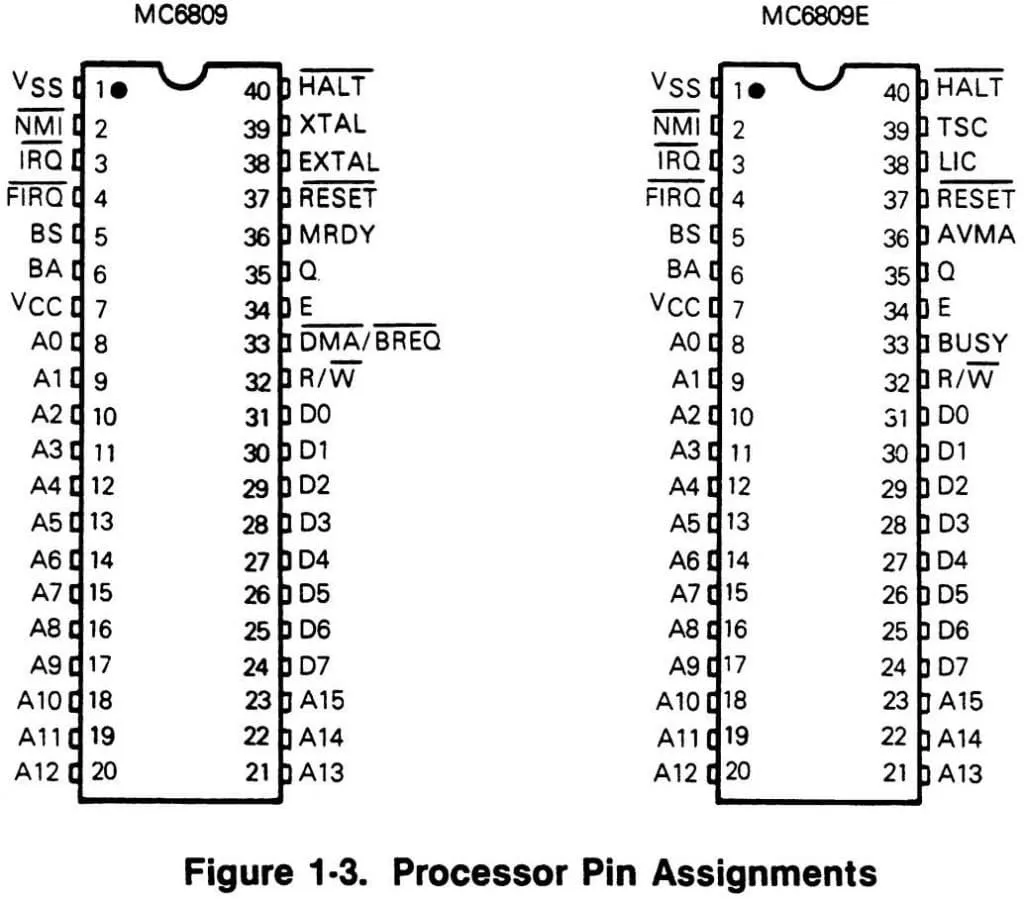
I tried to measure the 5V and it was ok, then I go to see the quartz clock and it was ok, I continue with the clock generated by the cpu (pin 34) and I notice the complete absence of signal while at pin 35 (Q) it was working, but this is a clock slightly out of phase with respect to the main one and not used on the pcb.
I started to check the signals on input pins A0-A15 and outputs D0-D7, nothing to do no sign of activity .. mmm strange!
I feel with my finger if the integrated heats and was actually hot, not like a sid in short just to make you understand, but hotter than the others (it was not hot).
I try the CIA on a C64 and it worked, so the main suspect was 6809.
Pay attention to the model used by the Vectrex card because there are 2 versions, a 68A09 or 6809P and a 6808E, the one with the final E cannot be changed with the other models and vice versa.
Well after about a week the cpu arrives .. Meanwhile I had cleaned the card well and mounted a socket on the 6809 and since I was there I also replaced the other 2 sockets of the CIA and the audio chip, they were a bit painful ..
Well, I mount everything including the new cpu and I don't have time to take the oscilloscope probe as I already hear the sound of the game :))))
Wow, I start to check and actually there are the signals on the inputs and the clock, I also check on the screen if you see everything and SHOW!
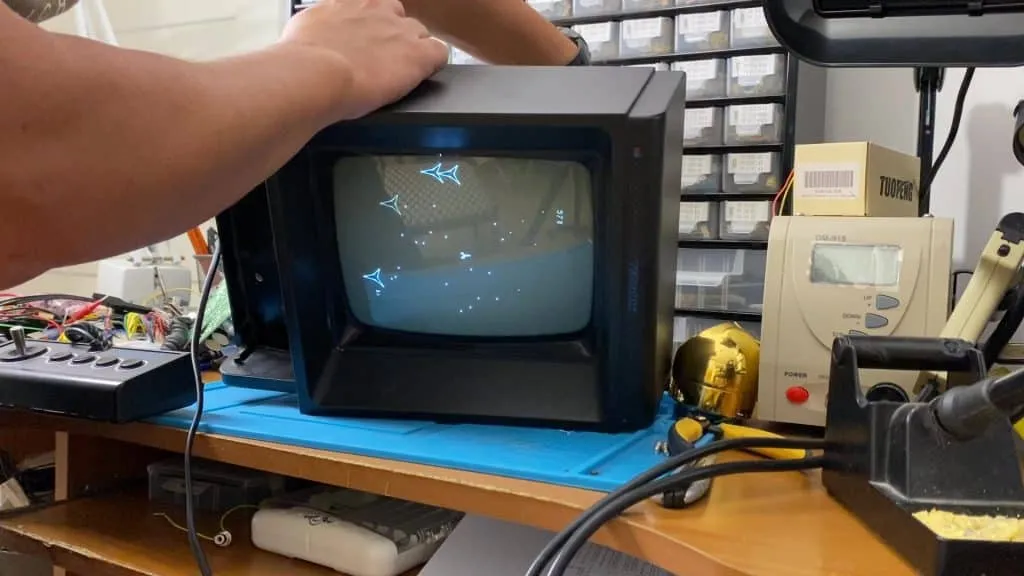
Perfect, I also test the functionality of the joystick and everything is working .. finally!
Only thing is the audio that makes a nice buzz, but this is normal for this machine, unless you have the latest version that corrects this problem a bit, the other versions are very noisy. No problem there is must be a fix! 😀
No buzz fix
Said, done ... Since I have everything taken apart, why not fix this problem too?
The noise is produced by the internal amplifier and the cables that run all over the monitor like highways, but you know that CRT monitors have a high voltage and frequency to make that transformer work and generate the necessary Kvs .. (not 1.21 gigowatts)
So the problem can be solved by using a separate amplifier and not going through the power board ..
You can find amplifiers like this model, often used in circuits even with Arduino:
https://www.amazon.it/dp/B07S2KCPMC/ref=cm_sw_em_r_mt_dp_HSMP56A12EMV0DW759W1
I used this one which is stereo and adjustable, always 5V:
https://www.amazon.it/dp/B08F1QWMXZ/ref=cm_sw_em_r_mt_dp_5CQPAPS6E0P6TGFHZKJ2
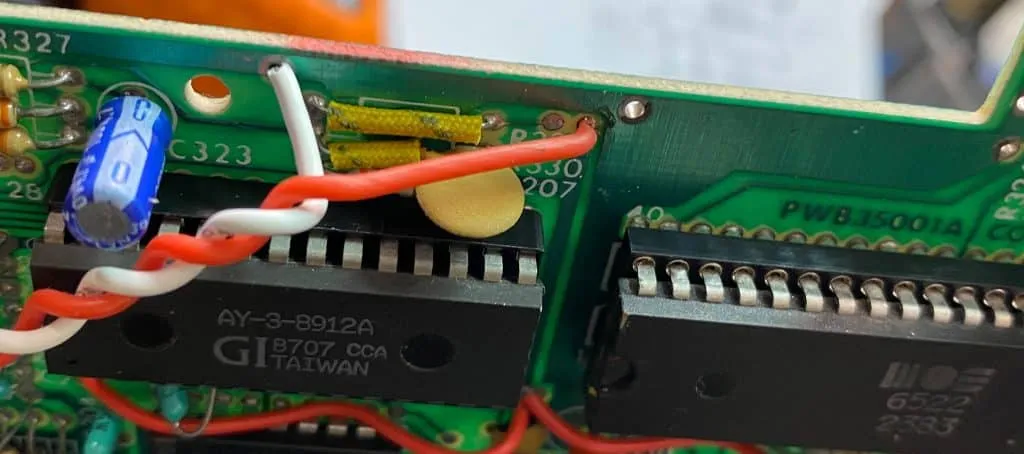
First we need to take the 5V needed for the amp, I took these points where I found the GND and a free 5V pitch, right next to the sound chip. The 5V are carried by the red jumpers, following the tracks there are empty pads where to connect, also for the GND.
We are almost there, we have the 5V and the audio signal, we take these cables to our audio amplifier (in my case it is stereo so I will only use one channel). From the amplifier we must then exit with the amplified signal and take it to the speaker. Nothing difficult, the speaker has a connector so it is easy to disconnect it from the base and if you want to do a good job you can use 2 leads of a component (a bit large) and solder them on the output pins, so you don't even have to cut the connector of the speaker or adapt it in some way. In the photo on the right you can see the terminals where I will then insert the speaker connector, so you can put it back as it originally was without any effort.
- = MOD FULL = -
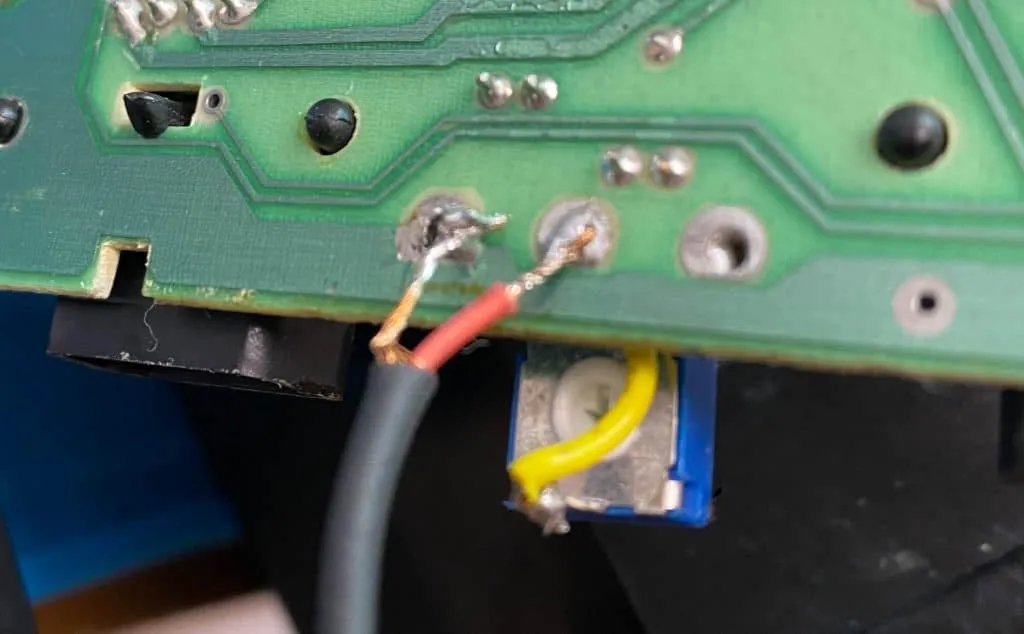
The audio signal is found directly on the console's potentiometer / switch.
A shielded cable must be used to limit noise !.
In the photo the pcb is seen from below (soldering side) just take the ground on the left (always seeing the soldering side and with the potentiometer at the bottom) of the potentiometer and the audio signal in the center.
The photo is indicative because the cable was soldered here just to do a test, then the original potentiometer was reassembled together with the cables.
If you haven't seen the video repair, don't miss this episode!
Subscribe to the channel, activate the bell to not miss the next outgoing videos ..
If you are only interested in the audio mod, check out this short video.


