Jiminy Cricket
29 October 2022
Building a Commodore 64GS
12 November 2022The classic 1541 problem
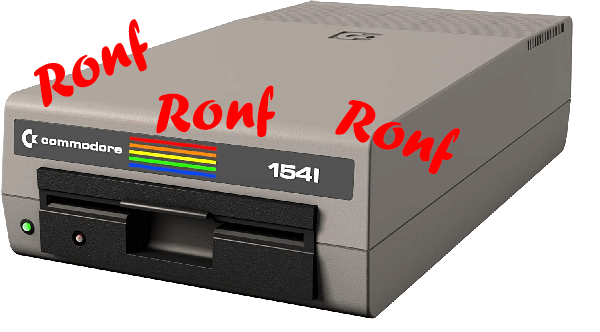
I happened to repair this Commodore drive, the 1541 first version (about 1982-85) with the most popular problem, ie the drive doesn't stop at startup and the red activity LED is always on.
This symptom is can be caused by several components and is like black screen for the C64. In fact, when starting, the drive must turn and the LED signals the activity and within a couple of seconds it must initialize and stop. If this doesn't happen it's due to the lack of response from the processor.. already! Did you know that in the Commodore floppy-drive there is a processor just like the one in the C64?, a MOS6502 complete with RAM and ROM, a real operating system that controls the drive and communicates with the computer.
This makes the drive more complicated because we have so many components and it could happen that someone fails and if the processor fails to read the program on the ROMs and initialize the drive, this remains in the state of continuous activity.
Where to start
As mentioned before, the things to check are different but we can initially focus on the part of the VIA - CPU logic.
It is not uncommon to find a faulty VIA (MOS6522) and since we have 2 in the drive, the simplest thing is to swap them, in fact if the faulty one was the chip that manages the control of the LED/motor we would have that by inverting them the drive resets itself correctly, obviously something else won't work but we have identified the problem on the GO in the meantime.
If we still haven't solved it, we can go ahead by following 2 paths, one with the help of an oscilloscope which will let us understand the signals on the various components in order to narrow down the problem or find it on the spot!. The second method is to be able to test/exchange the chips, but to do this we must have spares or use another working drive.
If we go with the oscilloscope, we test the usual clock, power and reset signals first to make sure the base is there, then we go on with the i/o and address signals up to the management ones like the CS, RDY, RW… also following the logic gates which are often in the middle of these signals and one of these faults can block the whole chain.
With the method of replacing the chips instead we can proceed first with those on the socket, so zero effort and we make sure that these work. If we don't have clogged ones, it doesn't make much sense to unsolder everything blindly.
However, we can hypothesize the main suspects, such as the ROM and the CPU and we can rely on our thermo-finger by feeling if we find any integrated that heats abnormally.
If we find the sockets it is good practice to check the pins and if there is oxide, in case clean everything thoroughly and use a contact cleaner spray to remove the oxide. Sometimes the problem can be a bad contact.
We can also help those who have already been there and have repaired many! in silk there are many forums and a lot of documentation for these models, I would say to start by taking a look at Ray Carlsen's page, here you will find a useful guide for troubleshooting:
Troubleshooting-1541.txt
In my case
The drive in question was repaired without using an oscilloscope or logic probe, just swapping the chips.
This was possible because I had the same drive and all major components socketed.
I started with the VIAs, CPUs and ROMs until I found the problem, but it wasn't that obvious, in fact all these components on my drive worked, so I should have continued.. but!.. I noticed that under the ROMs there were some old type clogs that often cause problems. In this case I put the ROMs of my drive that had the pins in perfect condition and slightly wider than the ones removed, well the result was that the drive started working again.
The problem he had was on the hooves that didn't make good contact with the chip. Removed those "horrors" and put back the original ROMs of the drive, this started to reset correctly on boot, but that's not all!.
Ok now the drive turns on fine but when i went to read a disk.. nothing, file not found..
I try a second one.. not found, I try one of my own which I'm sure works.. not found, but in my drive it works!.
At this point I try to load a software to test/calibrate the head of the drive, obviously we cannot load it from floppy, it will be necessary to use a cartridge or a second drive placed on another address (e.g. 9 if the drive to be tested is on n. 8).
Caricando il programma e leggendo le tracce, vedo una cosa strana, tutte riportano traccia 1 e 00 come allineamento.. strano, dovrebbe almeno indicare una traccia diversa, fisicamente la testina si sposta sulle varie tracce! 🙁
I go to investigate the head and I notice that the connector of this has been placed upside down..
I put it back and try again, this time the traces are read and the alignment too.
Final test with my disk and finally I get the directory and I can load the programs!!.
Watch the video to see all the steps, often we don't pay attention to everything we disassemble and if an object has been repaired or someone else has put their hands on it before us, we cannot know what has been done and maybe we take it for granted that the cables that we haven't touched are in the right place.. well, in these cases we need to see everything as well as the orientation of the chips on the socket! you never know.
As I always say at the end of the video!
Subscribe to the channel, it costs nothing and for us it is a gesture that helps us grow and do better and better.
Come andare al ristorante, mangiare e dire grazie! senza pagare 😀


2 Comments
I got a similar problem this evening : I swapped the 6522’s and the problem was solved. The problem 6522 was the one which had the biggest distance from the 6502 and I replaced it with a new old stock one. Problem solved….Thanx to yr idea of swapping them.
I’m happy to have helped you.